开启BBR加速:
lsmod | grep bbr
更新所有软件:
yum update -y
安装 epel 源:
yum install epel-release -y
再次确认软件是否有更新:
yum update -y
安装基础软件:
yum install bind-utils net-tools
wget ntp policycoreutils-python
chrony git dnf jg -y
安装开发组件:
yum groups install "Development Tools" -y
开启 chmod 时间同步:
systemctl enable chronyd
systemctl start chronyd
设置时区同步:
timedatectl set-timezone Asia/Shanghai
timedatectl set-ntp yes
timedatectl
重启服务器:
systemctl reboot
安装宝塔面板:(推荐英文版, 不会强制要求绑定宝塔账号, 缺点是没有中文)
yum install -y wget && wget -O install.sh http://www.aapanel.com/script/install_6.0_en.sh && bash install.sh forum
安装宝塔面板:(中文版, 适合新手操作, 可绕过绑定账号)
wget -O install.sh http://download.bt.cn/install/install-ubuntu_6.0.sh && bash install.sh
绕过绑定账号方法:
wget http://download.bt.cn/install/update/LiunxPanel-7.7.0.zip
unzip LinuxPanel-7.7.0.zip
cd /root/panel
bash update.sh
cd .. && rm -f LinuxPanel-7.7.0.zip && rm -rf panel
rm /www/server/panel/data/bind.pl
进入宝塔控制面板安装推荐软件 Nginx
安装 v*y:
bash <(curl -L https://raw.githubusercontent.com/v2fly/fhs-install-v*y/master/install-release.sh)
创建站点,使用 Let‘s Encrypt 文件验证开启强制 HTTPS
添加 Nginx 转发规则,在最后一个}前粘贴
location /path {
      proxy_redirect off;
      proxy_pass http://127.0.0.1:10086;
      proxy_http_version 1.1;
      proxy_set_header Upgrade $http_upgrade;
      proxy_set_header Connection "upgrade";
      proxy_set_header Host $host;
      # Show real IP in v*y access.log
      proxy_set_header X-Real-IP $remote_addr;
      proxy_set_header X-Forwarded-For $proxy_add_x_forwarded_for;
    }
找到 usr / local / etc / v*y / config.json 并更改:
{
    "inbound": {
        "streamSettings": {
            "network": "ws",
            "wsSettings": {
                "path": "/path", ##此项应与 Nginx 转发规则配置文件中的一致
                "headers": {
                    "Host": "yourdomain.com" ##此处填写自己的域名
                }
            }
        },
        "protocol": "vmess",
        "port": 10086, ##此项应与 Nginx 转发规则配置文件中的端口号一致
        "settings": {
            "clients": [
                {
                    "alterId": 0,
                    "id": "333fb819-ef2a-4f9e-80c4-1e3a93d98351"
                }
            ]
        }
    },
    "log": {
        "loglevel": "warning",
        "access": "/var/log/v*y/access.log",
        "error": "/var/log/v*y/error.log"
    },
    "routing": {
        "domainStrategy": "AsIs",
        "rules": [
            {
                "type": "field",
                "ip": ["geoip:private"],
                "outboundTag": "block"
            }
        ]
    },
    "outbounds": [
        {
            "protocol": "freedom",
            "tag": "direct"
        },
        {
            "protocol": "blackhole",
            "tag": "block"
        }
    ]
}
启动 v*y:
systemctl start v*y
查看 v*y 启动状态:
systemctl status v*y
将 v*y 添加到启动项:
systemctl enable v*y
更改 config.json 后需重启:
systemctl restart v*y
生成 UUID 可使用如下命令或通过 UUID Generator 生成,不可随意手打
v2ctl uuid
在 etc / systemd / system / v*y.service.d 下的 10-donot_touch_single_conf.conf 中修改环境变量:
Environment="V*Y_VMESS_AEAD_FORCED=false"
更改环境变量后需重启守护进程:
systemctl daemon-reload
如果出现Failed to start V*y Service 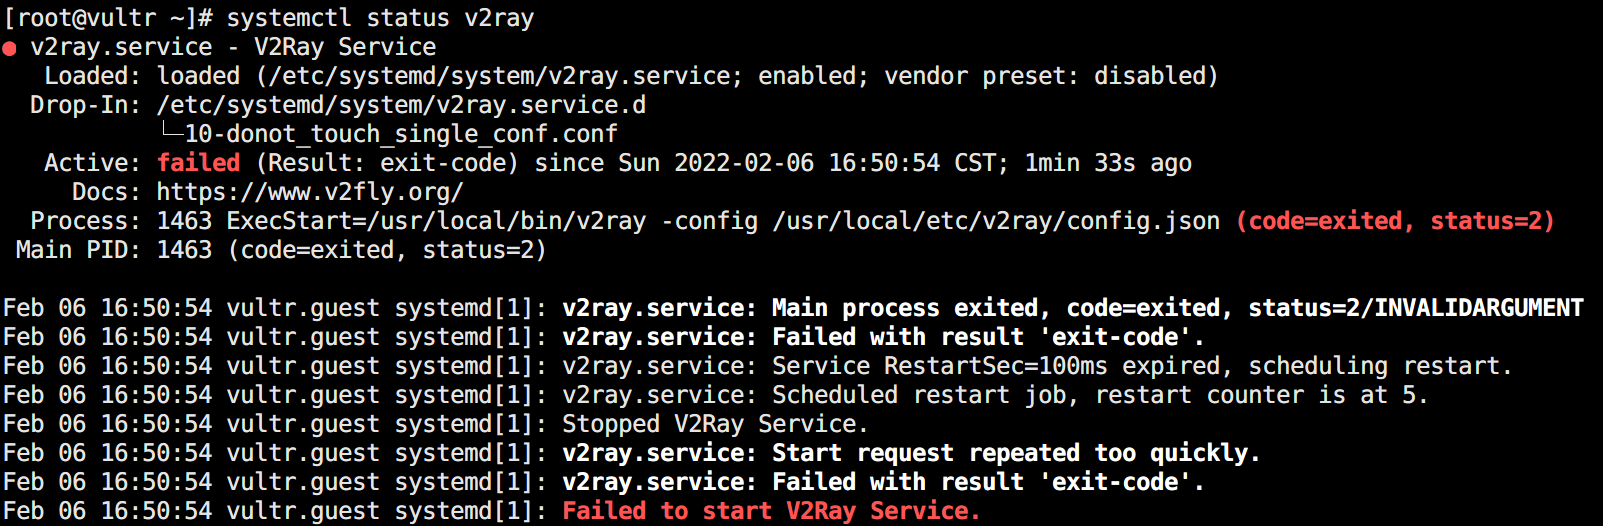
在 etc / systemd / system / v*y.service 中将User=nobody 改为 User=root
放行8888端口方法:
# 查看开放端口
firewall-cmd --zone=public --list-ports
#80/tcp 443/tcp
#没有8888时,添加8888端口
firewall-cmd --zone=public --add-port=8888/tcp --permanent
#重启才能生效,添加完重启
firewall-cmd --reload
#再次查看开放端口,发现已经有了8888,准备工作就完成了
firewall-cmd --zone=public --list-ports
#80/tcp 443/tcp 8888/tcp